Change EVIDENCE User Preferences
You set user preferences to make your experience in EVIDENCE more personalized and efficient. With your settings, EVIDENCE performs exactly the way you want it to. For example, you can set up custom clip naming options so that you don't have to manually name all the clips you have to create. EVIDENCE remembers what you want and performs accordingly.
EVIDENCE is also very flexible. If you use several different layouts for separate workflows, you can set up a different default layout for the workflow you use most often.
You can access your preferences by clicking the EVIDENCE User Preferences button on the EVIDENCE Start Page.

|
Note: Some preferences may not appear in the web client. |
Click on each section to expand. Current User Preferences include:
 Documents
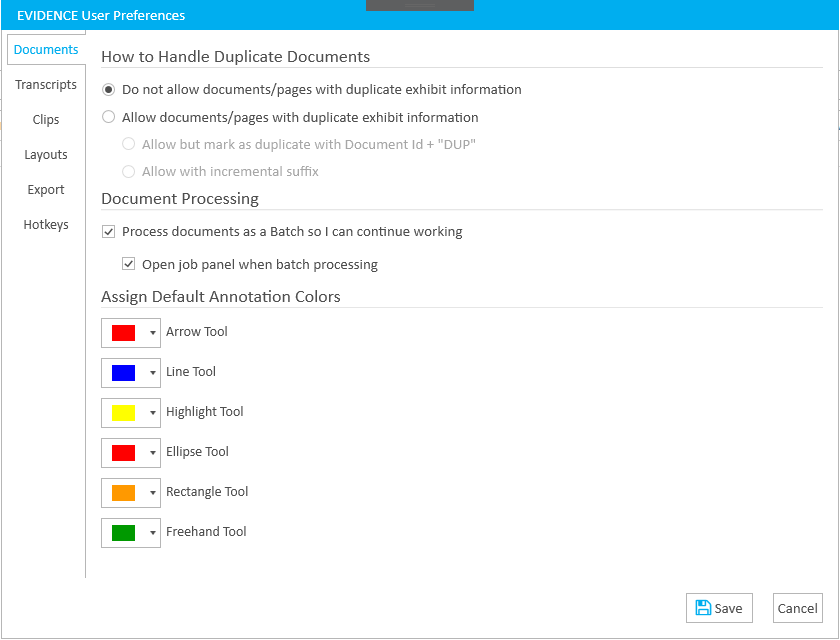
The options in this tab explain themselves. Select an option to apply the setting.
Transcripts
![]()
|
Option |
Info |
||
|
Display issues as |
The following options affect the way issue types are displayed within the Transcripts Explorer:
|
||
|
Show questions in bold text |
With this option selected, question text within the transcript appears in bold. If not selected, question text appears as normal.
|
||
|
Show answers in bold text |
With this option selected, answer text within the transcript appears in bold. If not selected, answer text appears as normal.
|
||
|
Show unspoken text in italics |
With this option selected, unspoken text within the transcript appears in italics. If not selected, unspoken text appears as normal.
|
||
|
Objections Color |
Objections within the transcript appear with the selected color.
|
||
|
Transcripts Scrolling Highlight Color |
The highlight bar that scrolls with the multimedia in a digital video transcript appears with the selected color.
|
||
|
Number of Lines in Transcript Scrolling Highlight |
This options sets the amount of lines covered by the highlight bar that scrolls with the multimedia in a digital video transcript.
|


Clips

|
Option |
Info |
|
Confirm name and description when creating a new clip |
When creating a new clip, if this option is selected, a dialog box appears to allow you to change the name and description of the new clip. If not selected, the dialog will not appear, and you can quickly create clips without checking the name and description every time. |
|
Use custom formatting for clip identifiers |
With this option selected, when creating clips, each new clip will use the naming convention in the field. You can use tokens to make the naming process for clips even easier. Available tokens include:
|
|
Confirm before splitting segments when manually creating clips |
With this option selected, you will be prompted before any segments added to a clip are split according to the supplementary options below:
|
|
Set the next workflow step once a clip has been finalized |
Within the Clip Work Area, after setting the status of a clip as Finalized, the selected option will execute:
|
Layouts
|
Option |
Info |
||
|
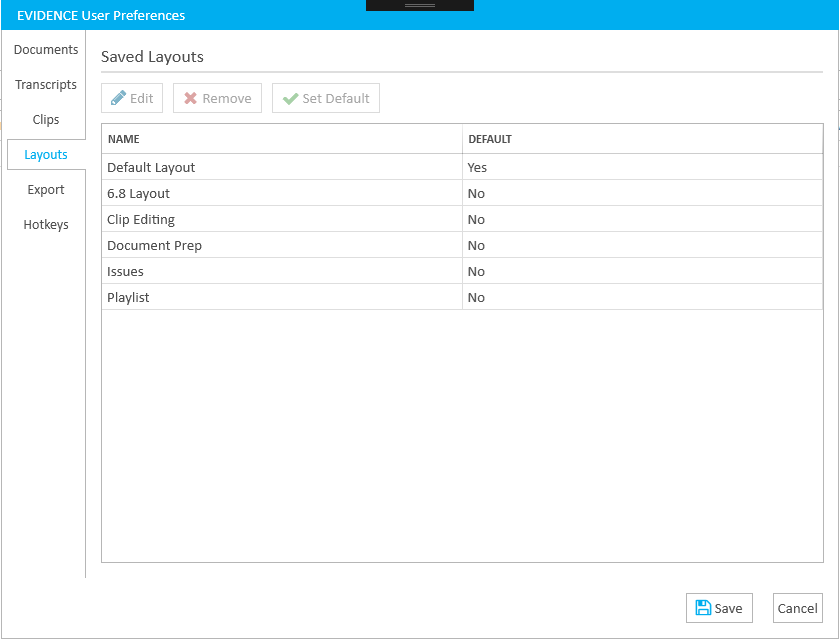
Saved Layouts |
From this tab, you can change the name of a layout, remove a layout, or set a layout as default.
To begin, select a layout, then click the button you want to use:
|
Export
|
Option |
Info |
|
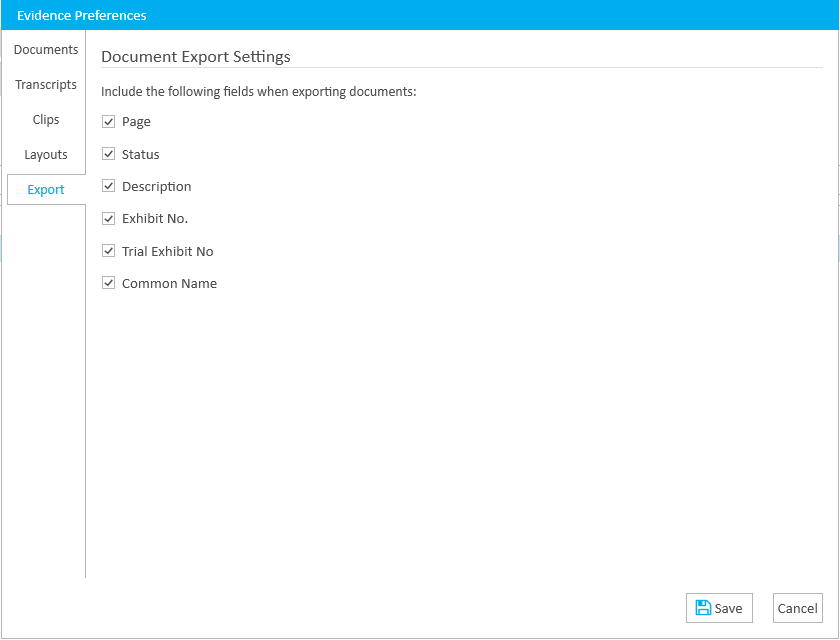
Document Export Settings |
The following settings are available to set the default selections when exporting document data:
|
Hotkeys
There are hotkeys that can be used when working with documents in EVIDENCE. You can easily change the hotkey combinations or reset hotkey combinations. You can also show the hotkey assignments in Notepad.
| Note: If you change hotkey assignments the EVIDENCE User Preferences, it does not carry over into PRESENT Preferences. |
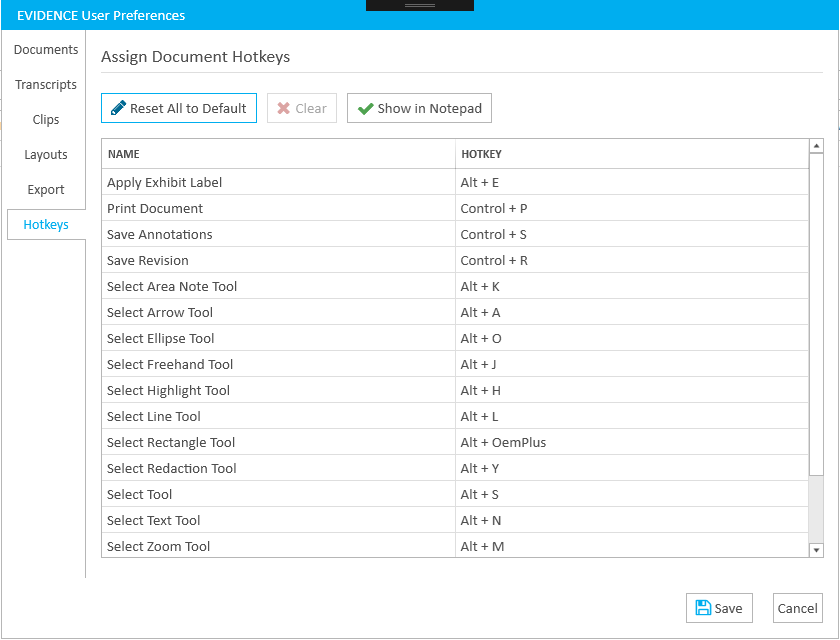
Option | Info |
ALT+E | Apply Exhibit Label |
CTRL+P | Print Document |
CTRL+S | Save Annotations |
CTRL+R | Save Revision |
ALT+K | Select Area Note Tool |
ALT+A | Select Arrow Tool |
ALT+O | Select Ellipse Tool |
ALT+J | Select Freehand Tool |
ALT+H | Select Highlight Tool |
ALT+L | Select Line Tool |
ALT+OemPlus | Select Rectangle Tool |
ALT+Y | Select Redaction Tool |
ALT+S | Select "Select" Tool |
ALT+N | Select Text Tool |
ALT+M | Select Zoom Tool |
CTRL+Insert | Zoom In |
CTRL+Delete | Zoom Out |
CTRL+Home | Zoom to Fit |