Create a Case without TrialDirector 360 EVIDENCE
You may have purchased a TrialDirector 360 subscription with the PRESENT feature set all on its own. But, without EVIDENCE, how can you get files into PRESENT so that you can display them at trial?
While it is much easier to create a case and manage case files with EVIDENCE, it is possible to set up a case for PRESENT using your computer's local file system.
To create a case without the EVIDENCE feature set, use the information below:

|
Note: Click on a screenshot's thumbnail to expand it.
|
Setup
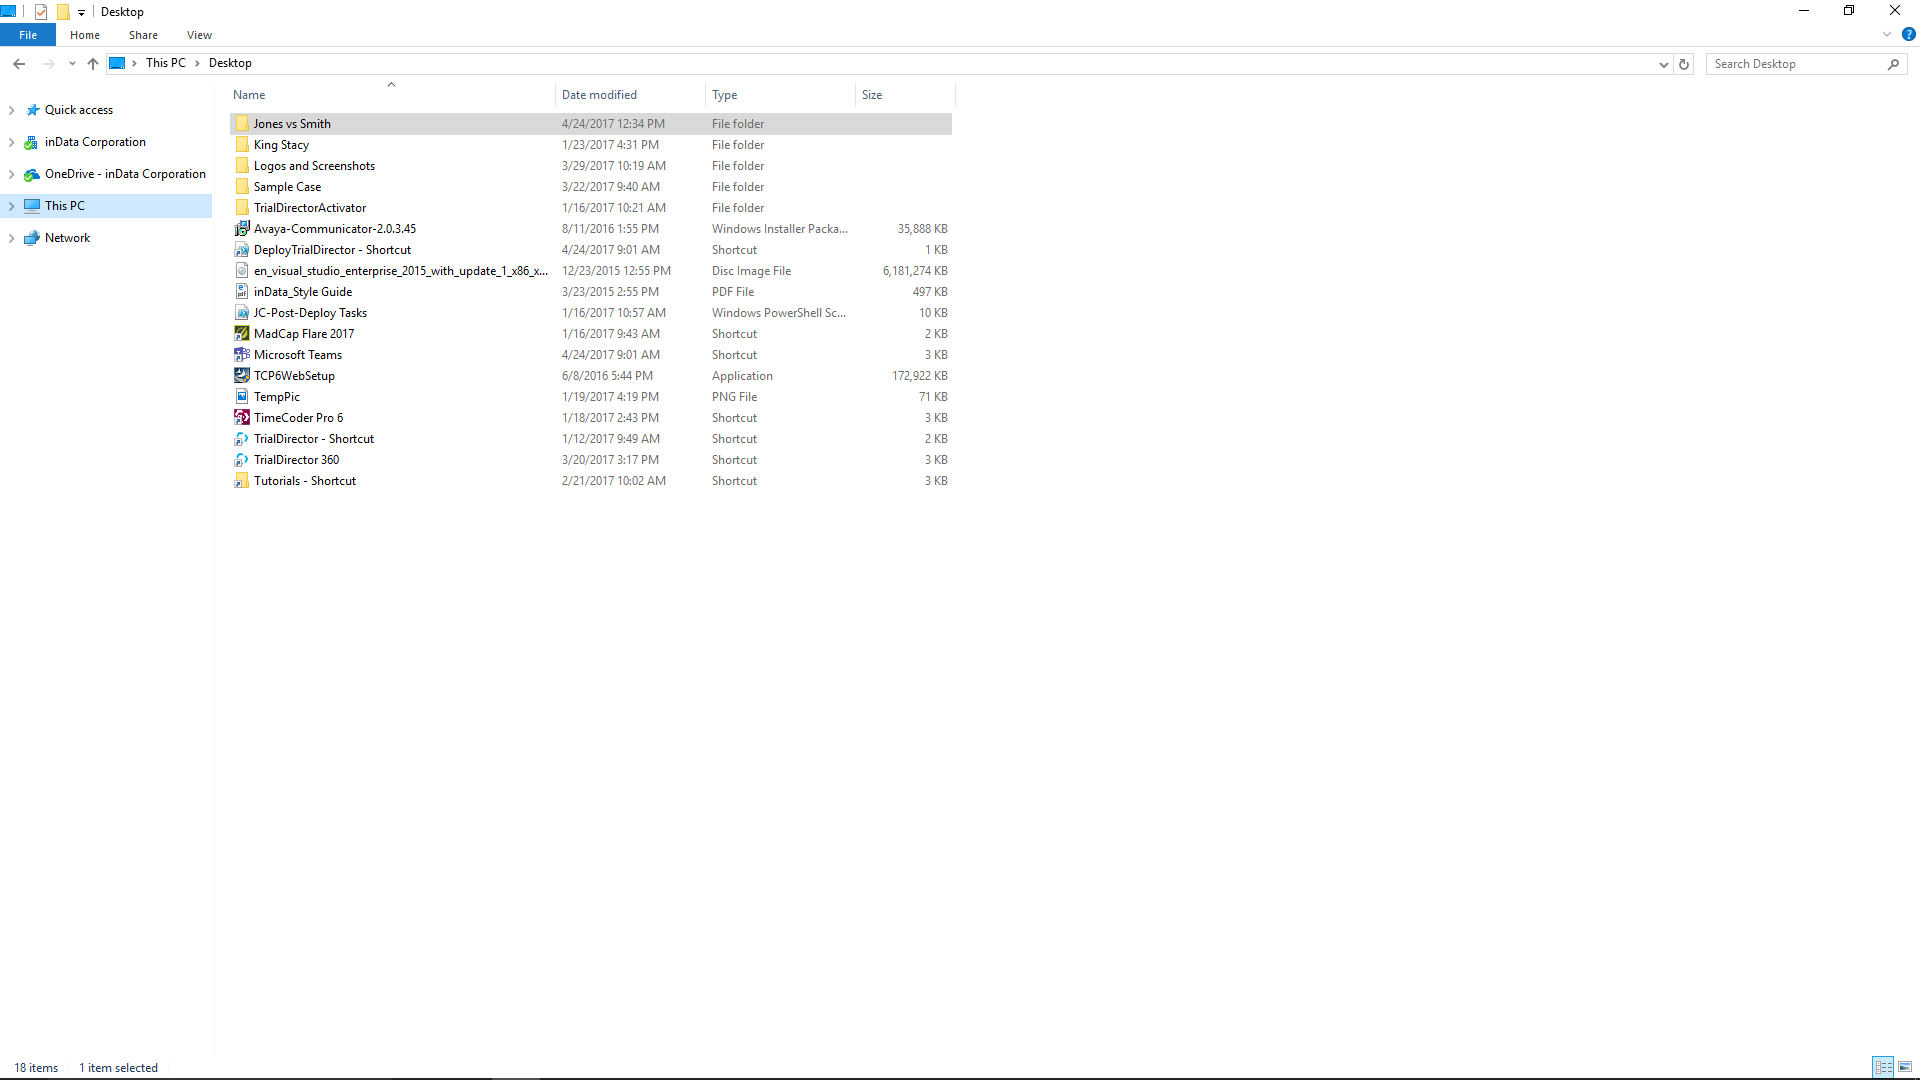
First, open File Explorer in Windows and create a folder for your case. The folder can be located anywhere on your computer, but make sure the name of the folder is the same as what you want the name of your case to be. For this example, we will name the case "Jones vs Smith".
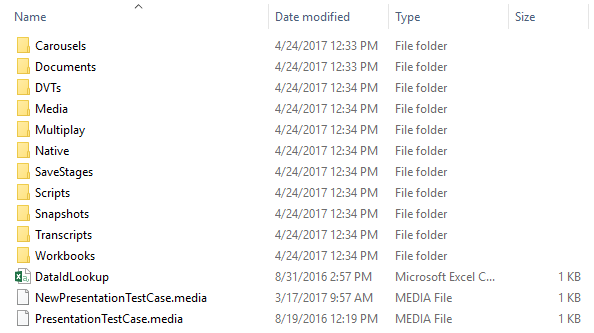
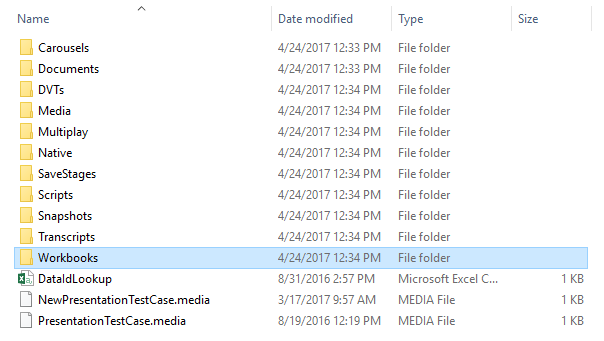
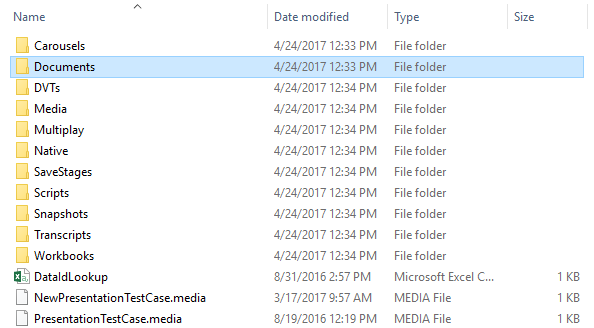
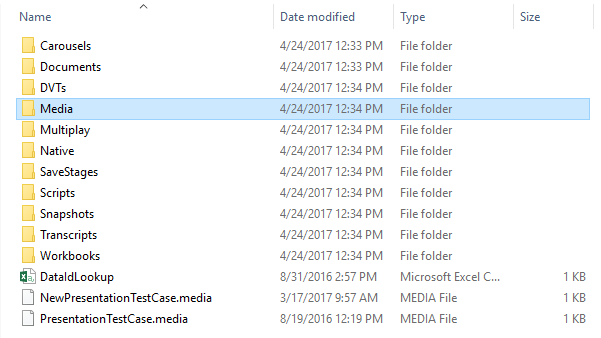
Inside the case folder, create the following folders and files exactly as they are shown in the screenshot below:
This folder and file structure allows PRESENT to understand where case items are located and how to display them. Again, every case you want to show in PRESENT must follow this structure exactly, including the naming of each folder and file. PRESENT on its own can only display what it can understand from these folders and files. You cannot add, change, or remove files and folders from within the PRESENT feature set.
We will go through each folder and file needed in detail in order to successfully display case items.
Click each section below to expand or collapse it.
Each file in a case has an Item Id. The Item Id. is the same as whatever file's name is in the File Explorer. You can use the Item Id. or other Id. types to call up documents in PRESENT. However, PRESENT needs a way to know how an Item Id. is associated with the other complementary Id. names so that it displays the correct case item.
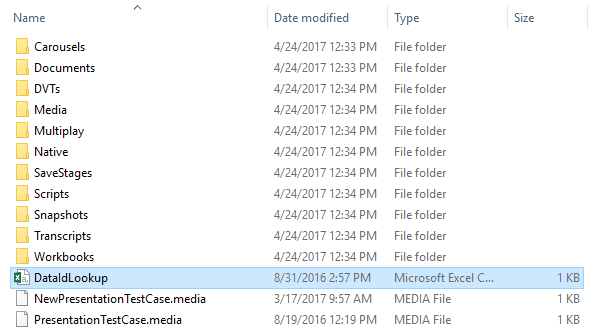
EVIDENCE allows you to easily add different properties and names to case items, but without it you need a CSV file.
This file highlighted in the screenshot above is a pipe-delimmited file that allows you to map and associate each case file's Item Id. with other forms of identification (e.g. Exhibit Id., Trial Exhibit Id., and Common Name). Without this mapping, case items can only be called up using their Item Id.
You can create the file using Excel or Notepad. Ensure the file extension is ".csv".
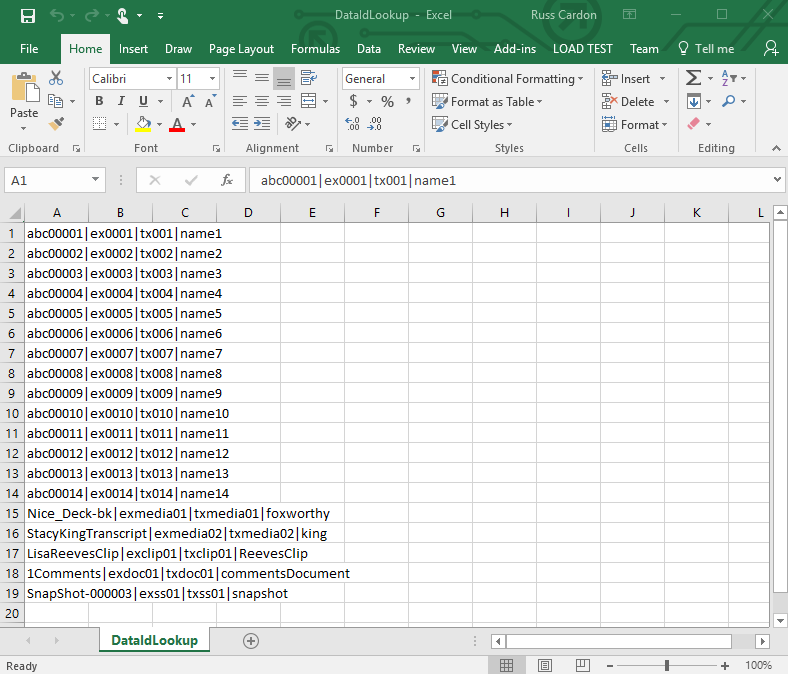
The contents of the file should look like this:
Each row above represents the different Id. types for one case item. Each column in the row contains the Id. type. The columns are separated by the pipe "|" character that you should be able to find on your keyboard. Each row has to follow the following order:
Item Id.|Exhibit Id.|Trial Exhibit Id.|Common Name
If an item doesn't have a Trial Exhibit Id., but it does have an Item Id., an Exhibit Id., and a common name, the row for that item would look like this:
abc00001|ex0001||name1
There are two pipe characters with nothing between them to act as a placeholder for the Trial Exhibit Id. Without the placeholder, PRESENT would think "name1" is the Trial Exhibit Id.
If an item didn't have a TrialExhibit Id. as well as a common name, the row for that item could look like this:
abc00001|ex0001
Or this:
abc00001|ex0001||
Workbooks allow you to organize and present your case more effectively. In EVIDENCE, you can easily create workbooks at the click of a button and drag case items into those workbooks. Without EVIDENCE, you need to manually set up workbooks yourself.
Inside the Workbooks folder, create a folder for each workbook you want. The name of the folder will be the name of the workbook in PRESENT. The folder name must contain the underscore character "_" at the beginning like this: "_Workbook1". The underscore helps PRESENT identify the folder as a workbook.
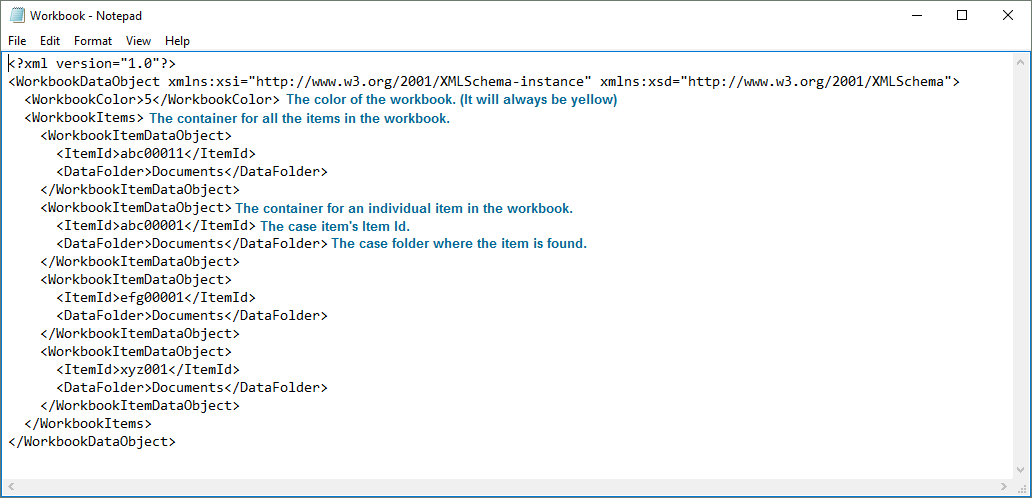
To add case items to a workbook, you need to create an XML file. You can create the XML file with Notepad. Name every XML file in each of your workbooks "Workbook". The XML file must look like this in order for items to appear in the workbook in PRESENT:
The XML file must follow format and tags exactly.
Inside a workbook, you can create Sub-Workbooks.
To add case items to a sub-workbook, inside each sub-workbook folder, create the same "Workbook" XML file and format it exactly as described above.
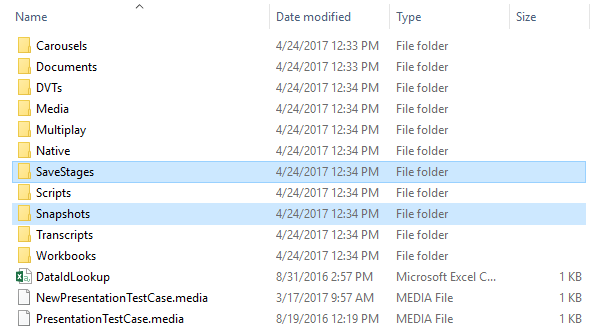
The following folders in the main case folder are other types of workbooks:
These types of workbooks have special properties when used in PRESENT. Creating workbooks and adding items within each of those workbook type folders follows the same process as already described above.
All you need to do is create these folders. You do not need to worry about what goes inside. This is where the respective files are stored when Save Stages and Snapshots are created within PRESENT itself. However, PRESENT will not know where to put the files if these folders do not exist.
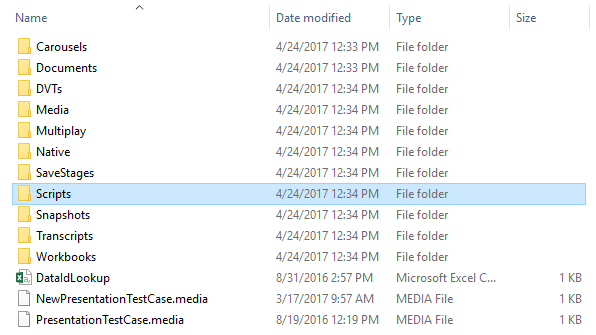
This folder is where you will put your presentation script files. Click here for more information on how to create and present scripts.
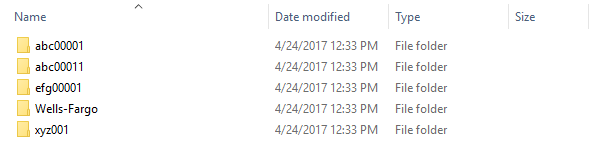
The Documents folder is where you keep all the document images of a case. Inside the Documents folder, create a new folder for every single or multi-page document. Use the Item Id. to name each folder. Then add the images for each page of the document to that folder.
Here's what it looks like inside the Documents folder:
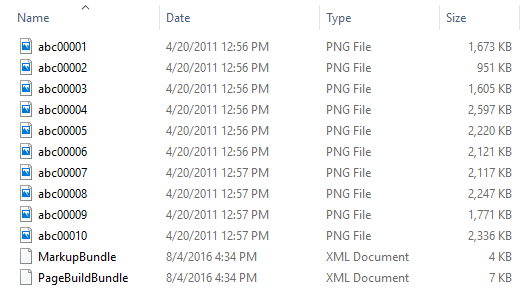
And here's what it looks like inside an individual document's folder:
|
|
Note: The document images must be in PNG format.
|
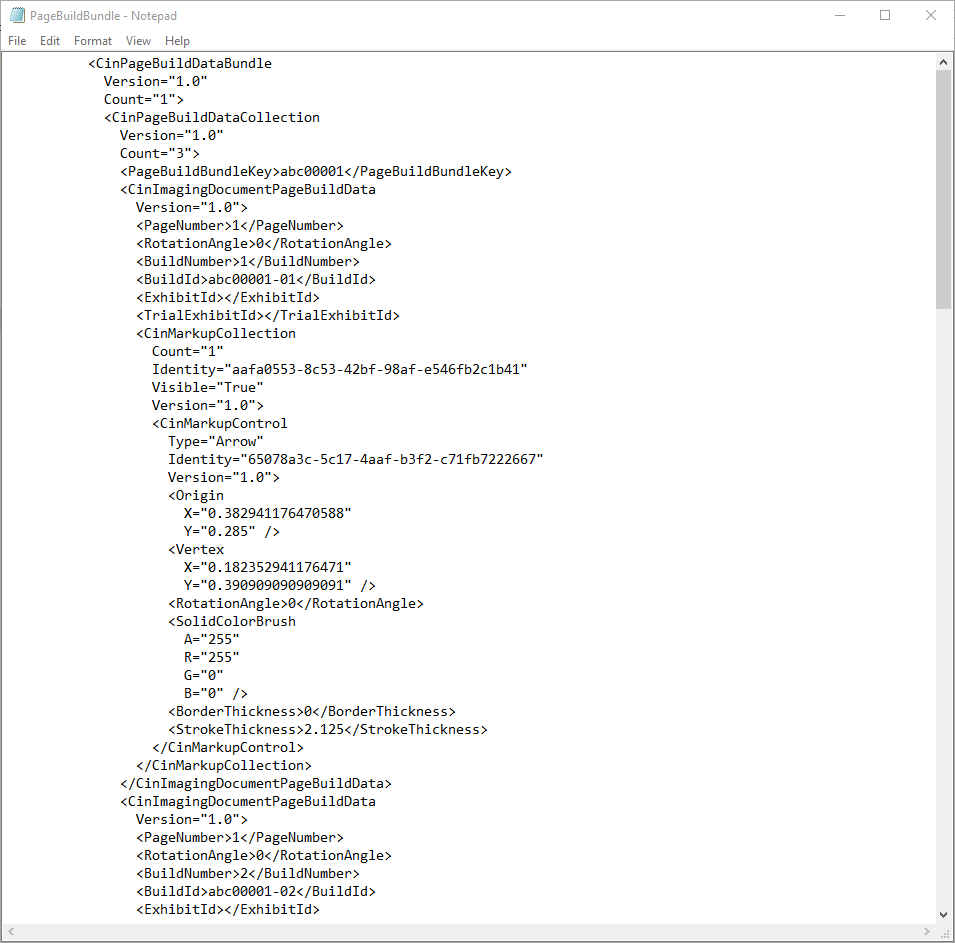
Notice the two XML files: MarkupBundle and PageBuildBundle. These XML files are what allow you to pre-treat documents with annotations and revisions. With EVIDENCE, you can simply open a document, mark it with annotations, and save it over the original file or as a revision. But without EVIDENCE, you have to do it all manually with code, otherwise PRESENT won't know where to put the annotations.
|
|
Note: Ensure the XML files are named exactly as shown. These XML files are not needed if you do not want pre-treated documents in your case. You will still be allowed to annotate documents on-the-fly in PRESENT, but you will not be able to save those annotations.
|
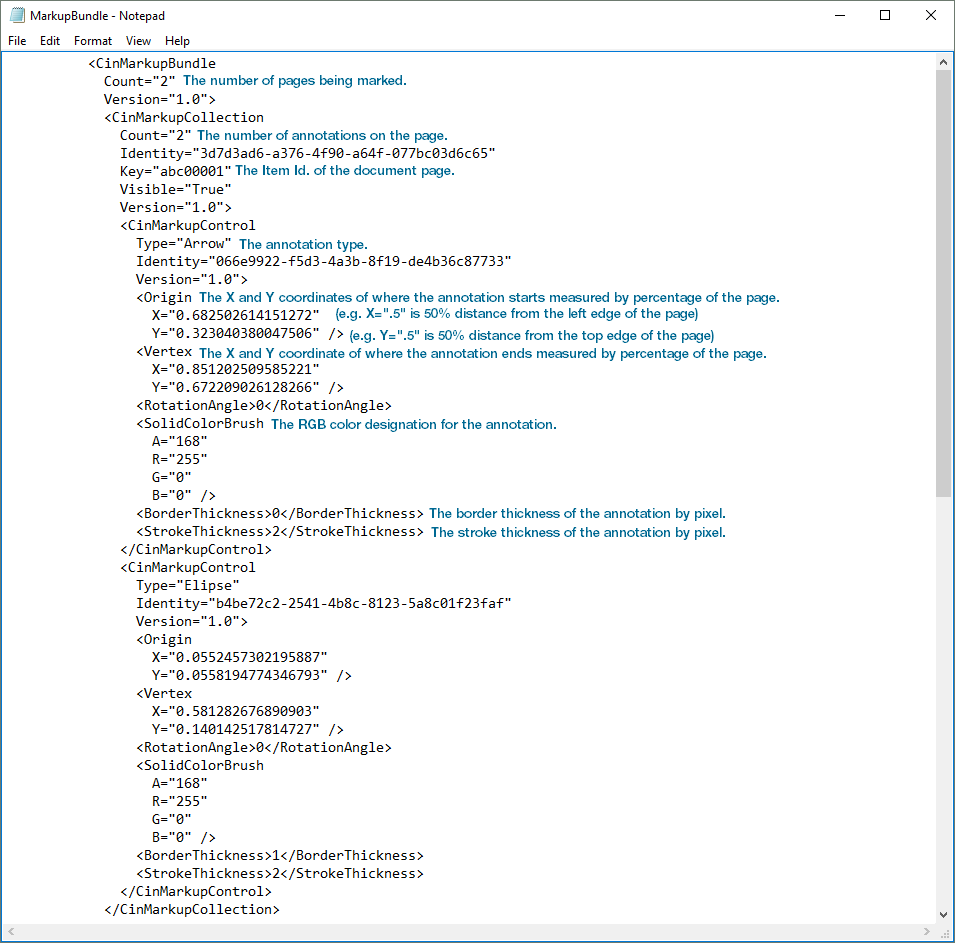
The MarkupBundle file only deals with pre-treating the document with annotations. Here's what it looks like:
The PageBuildBundle is formatted in much the same way as the MarkupBundle, but creates a revision of the page it is annotating.
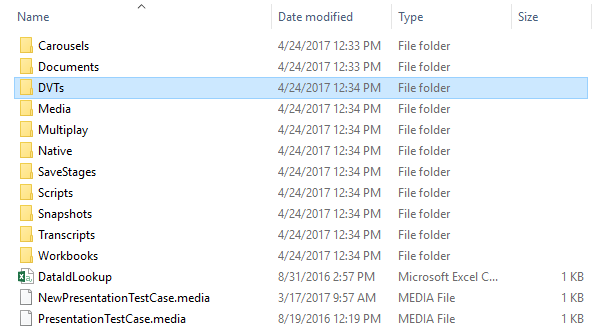
In principle, the DVTs folder works much the same way as the Documents folder. This DVTs folder is where you can store all the media of digital video transcripts in the case. Inside the folder, create a new folder for a DVT. To name the folder, use the same name of the transcript and add "Clip" on the end.
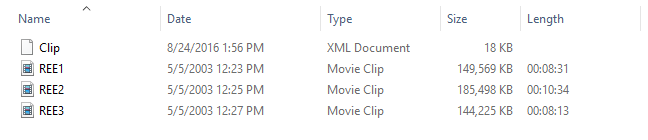
Here is what the inside of the DVTs folder can look like:
Put the media for the synchronized transcript inside the folder you create.
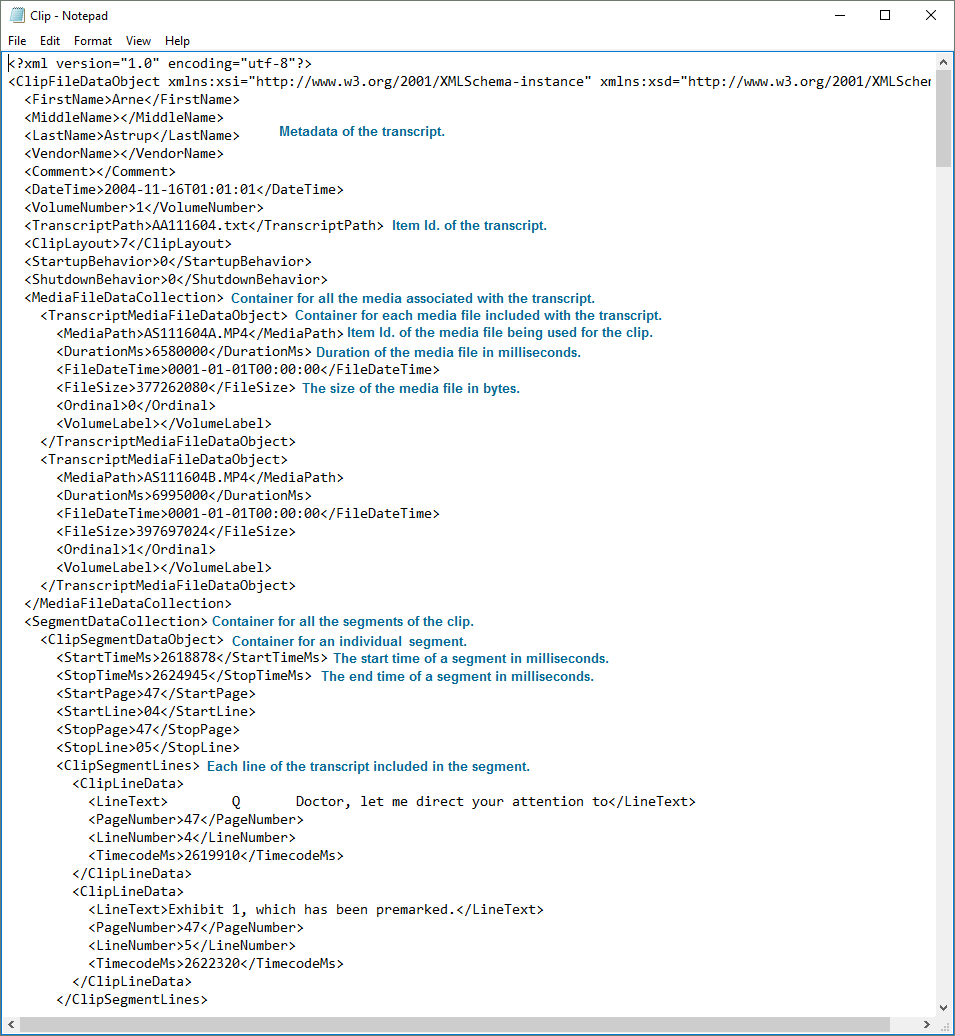
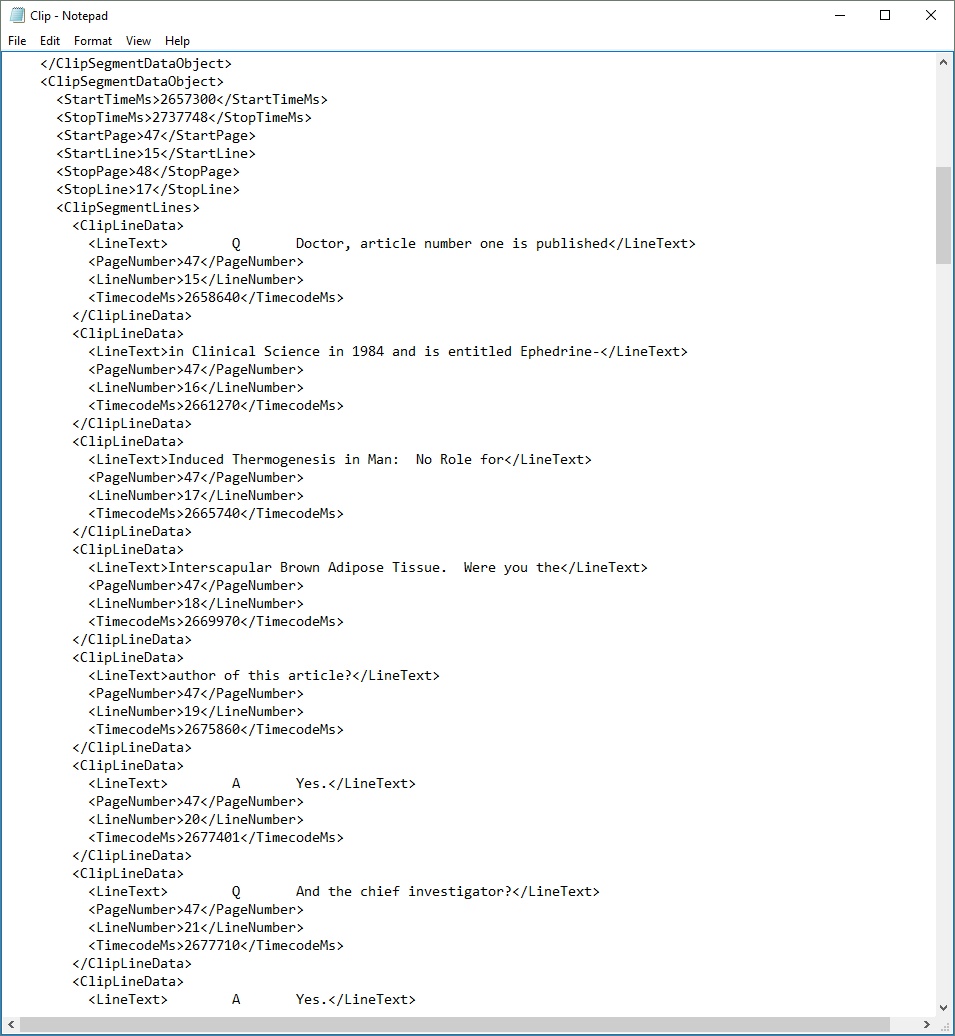
Notice the Clip XML file. Create this file to create clips of the DVT. Here's what the file should look like:
Notice that each segment must also contain every single line of text of the segment.
The Transcripts folder is where you keep all the transcript files of a case. Inside the Transcripts folder, create a new folder for every single transcript. Then, add the transcript file to the folder you created.
You can also create an XML file where you can store the metadata of the transcript. Ensure the name of the XML file is "Transcript" as seen above. Here's what it should look like:
The Media folder is where you will put all of the media items in a case. You can just copy the files into this folder. There are no other steps.